Getting dental implants is a big decision, and knowing what happens after surgery helps you feel prepared and confident.
The recovery process follows a clear pattern that most patients experience, though your personal timeline might vary slightly based on your health and how many implants you receive.
Understanding each phase of healing makes the journey less stressful and helps you know what’s normal.
Your dental implant recovery typically spans three to six months, starting with initial healing in the first two weeks, followed by a crucial bone fusion period, and ending with your permanent crown placement.
The good news is that most people find the recovery more manageable than they expected. You can return to many of your regular activities fairly quickly, though your body will continue important healing work beneath the surface.
This guide breaks down what to expect during your dental implant recovery week by week, from the moment you leave surgery through getting your final restoration.
You’ll learn about managing discomfort, adjusting your diet, and recognizing the signs that show your implant is healing properly.
Key Takeaways
- The first two weeks focus on managing swelling and eating soft foods while your surgical site begins healing
- Months two through five involve osseointegration where your jawbone fuses with the titanium implant post
- Your final crown gets placed once the implant fully integrates, completing your restoration and allowing you to eat normally
Schedule your dental implant consultation in Hutto, TX and get a personalized recovery timeline.
Overview of Dental Implant Recovery
Dental implant recovery involves a surgical procedure followed by several months of healing where your jawbone fuses with the titanium post.
The process includes distinct phases from initial surgery through final crown placement, with most discomfort occurring in the first two weeks.
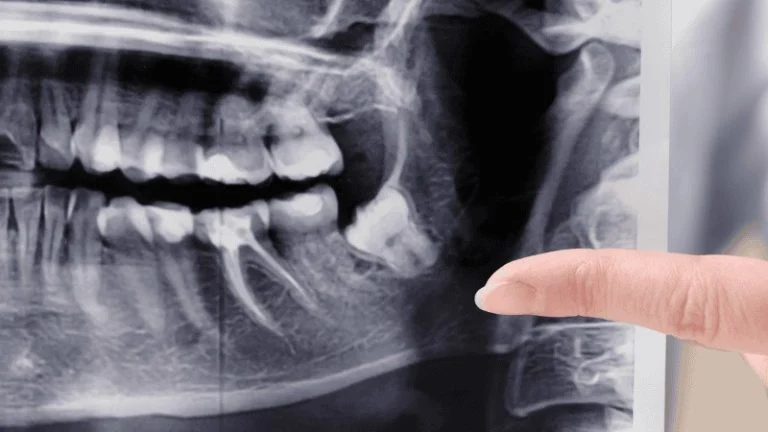
What Happens During Dental Implant Surgery
During dental implant surgery, your dentist places a titanium post into your jawbone where your missing tooth used to be. You’ll receive local anesthetic to numb the area completely, so you won’t feel pain during the procedure itself.
The surgeon makes a small incision in your gum tissue to expose the bone. They then drill a precise hole and insert the titanium implant post into your jawbone. This post acts as an artificial tooth root that will support your new tooth.
In some cases, you might need a bone graft if your jawbone isn’t thick enough to support the implant. The entire surgery typically takes one to two hours per implant.
After placing the post, your dentist stitches the gum tissue closed over or around the implant site.
Key Stages of the Healing Process
The healing process after dental implant placement happens in three main stages. The first stage is initial wound healing, which occurs during the first two weeks after surgery.
You’ll experience swelling, minor bruising, and discomfort as your gums begin to heal around the implant.
The second stage is osseointegration, which lasts from weeks three through twelve or longer. During this critical phase, your jawbone grows around and fuses directly with the titanium implant post.
This fusion creates the stable foundation that makes dental implants so durable.
The final stage involves placing the abutment and crown. Once osseointegration is complete, your dentist attaches a connector piece called an abutment to the implant.
After your gums heal around the abutment, they’ll place your custom-made crown.
Typical Recovery Timeline Explained
Your dental implant recovery timeline spans several months from start to finish. Here’s what you can expect:
Weeks 1-2: Initial healing with swelling and discomfort. You’ll eat soft foods and follow strict oral hygiene instructions.
Weeks 3-12: Osseointegration occurs quietly beneath the surface. Most patients feel normal during this time and can gradually return to regular foods.
Months 3-6: Final restoration phase where your abutment and crown are placed. Some patients complete this stage earlier depending on their healing.
The total time from surgery to final crown placement typically ranges from three to six months. Your individual healing speed depends on factors like your overall health, the number of implants you receive, and whether you needed a bone graft.
Visit our implant team in Hutto, TX to plan your smooth and stress-free healing process.
Week 1: Immediate Post-Surgery Care
The first week after your dental implant surgery focuses on managing discomfort and protecting the surgical site while your body begins the healing process.
You’ll need to follow specific aftercare instructions for pain control, eating soft foods, and keeping your mouth clean without disturbing the implant.
Managing Pain, Swelling, and Bleeding
You can expect some swelling, bruising, and discomfort during the first week of dental implant recovery. This is a normal part of post-operative care.
Your dentist will likely prescribe pain medication or recommend over-the-counter options like ibuprofen to keep you comfortable.
Apply ice packs to your face near the surgical area for 10-20 minutes at a time during the first 24-48 hours. This helps reduce swelling significantly. Make sure to wrap the ice pack in a cloth to protect your skin.
Some minor bleeding is normal in the first day or two. Bite down gently on gauze pads if needed to control it. Avoid spitting forcefully or using straws, as the suction can disturb the blood clot forming at the implant site.
Rest is crucial during these first few days. Avoid strenuous exercise and keep your head elevated when lying down to minimize swelling.
Dietary Restrictions and Soft Food Recommendations

Your diet needs to change temporarily to support implant healing and protect the surgical area. Stick to soft foods and liquids for at least the first week.
Good food choices include:
- Smoothies and protein shakes
- Yogurt and pudding
- Mashed potatoes
- Lukewarm soups (avoid hot temperatures)
- Scrambled eggs
- Applesauce
- Oatmeal
Avoid hard, crunchy, chewy, or sticky foods that could irritate the implant site. Don’t chew directly on the side where your implant was placed. Stay away from extremely hot or cold foods that might cause sensitivity.
Essential Oral Hygiene and Rest Guidelines
Keeping your mouth clean is vital for preventing infection, but you must be gentle around the implant. Your dentist will give you specific aftercare instructions for oral hygiene during this phase.
Rinse your mouth gently with warm salt water (mix half a teaspoon of salt in a cup of warm water) starting 24 hours after surgery. Do this several times a day, especially after eating.
Some dentists prescribe an antimicrobial rinse instead.
You can brush your other teeth normally, but avoid the surgical site for the first few days. When you do start cleaning near the implant, use a soft-bristled toothbrush and be extremely gentle.
Don’t smoke or drink alcohol during this week. Both can slow healing and increase your risk of complications. Get plenty of sleep and avoid activities that could bump or injure your mouth.
Book your implant evaluation today and get a clear recovery roadmap.
Weeks 2–4: Early Recovery and Healing Progress
Most of the initial discomfort fades during this period as your body adapts to the implant. You’ll notice improvements in swelling and may have appointments to check on your progress.
Reduction in Discomfort and Swelling
The second week brings noticeable relief as swelling decreases significantly. You’ll likely need less pain medication, and the tenderness around the implant site begins to fade.
By week three, most patients feel comfortable enough to return to normal daily activities. The bruising around your gums should be nearly gone. You might still feel minor sensitivity when touching the area, but sharp pain should not be present.
During week four, the implant healing process continues beneath your gums. While you feel better on the surface, osseointegration is actively happening as your jawbone fuses with the titanium implant. This invisible process is critical for long-term success.
You can gradually add more foods to your diet during this time. Start with softer versions of regular foods before moving to harder textures. Avoid anything excessively crunchy or sticky that could disturb the healing area.
Follow-Up Appointments and Suture Removal
Your dentist will schedule a check-up during the second week to examine how well you’re healing. They’ll look for signs of infection and confirm the implant is stable.
If you received dissolvable sutures, they’ll break down on their own within 7-10 days. Non-dissolvable stitches require removal, which your dentist will handle during this follow-up visit.
The removal process is quick and causes minimal discomfort.
These appointments let your dentist assess whether dental implant healing is progressing as expected. They’ll answer questions about your recovery and adjust your aftercare instructions if needed. Don’t skip these visits even if you feel fine.
Gentle Oral Hygiene Practices
Keeping your mouth clean is essential, but you need to be careful around the implant. Use a soft-bristled toothbrush and avoid directly brushing the surgical site for the first two weeks.
Rinse with warm salt water or prescribed antiseptic mouthwash after meals. Mix half a teaspoon of salt in a cup of warm water and gently swish it around your mouth. Don’t spit forcefully, as this can disrupt healing.
After week two, you can carefully clean around the implant with gentle circular motions. Your dentist may recommend special tools like interdental brushes for hard-to-reach areas.
Following proper aftercare instructions protects your investment and prevents complications.
Avoid using mouthwashes containing alcohol during early recovery, as they can irritate healing tissues. Continue brushing your other teeth normally to maintain overall oral health while the implant heals.
Weeks 5–12: Osseointegration and Stabilization
During weeks 5 through 12, your implant undergoes the most critical phase of healing as your jawbone fuses with the titanium post.
You’ll notice improvements in comfort and can slowly return to more normal eating habits while your dentist monitors your progress.
The Process of Osseointegration
Osseointegration is when your jawbone grows around and bonds with the implant surface. This natural process gives your implant the strength to support a replacement tooth.
During this time, bone cells attach directly to the titanium, creating a stable foundation.
The process happens gradually over several weeks. Your body treats the implant like a natural tooth root, building new bone tissue around it. Most people don’t feel this happening, but it’s working behind the scenes.
Key factors that support successful osseointegration:
- Good oral hygiene to prevent infection
- Adequate nutrition with calcium and vitamin D
- Avoiding smoking and excessive alcohol
- Not putting pressure on the implant site
- Following your dentist’s care instructions
By week 12, complete osseointegration should be well underway. Your implant becomes firmly anchored in your jaw, ready for the next steps.
Gradual Expansion of Diet and Activities
You can start adding more foods back into your diet during this period. Begin with slightly firmer textures around week 5, then progress as you feel comfortable. Listen to your body and don’t rush the process.
Foods to introduce gradually:
- Cooked vegetables (steamed or roasted)
- Tender meats and fish
- Pasta and rice dishes
- Soft breads and sandwiches
Avoid hard, crunchy, or sticky foods until your dentist gives you the green light. Things like nuts, hard candies, and chewy meats can still put too much pressure on your healing implant.
Chew on the opposite side of your mouth when possible.
You can also resume most normal activities. Light exercise is fine, but avoid contact sports or activities that could result in facial trauma. Dental implant healing requires protection from accidental bumps or hits.
Monitoring Healing and Attending Check-Ups
Your dentist will schedule follow-up appointments to check how your implant is healing. These visits are important for catching any potential problems early.
Your dentist will examine the implant site and may take X-rays to confirm the bone is integrating properly.
During check-ups, your dentist looks for signs of infection, checks the surrounding gum tissue, and evaluates bone growth. They’ll also assess whether you’re ready for the next phase, which involves placing the abutment and crown.
Keep attending all scheduled appointments, even if you feel fine. Some issues aren’t visible or don’t cause symptoms right away. Your dentist has the tools and expertise to spot problems before they become serious.
Contact your dentist between appointments if you notice unusual pain, swelling, or looseness around the implant. These could signal complications that need immediate attention.
Final Restoration: Abutment and Crown Placement
After your implant has fused with your jawbone, you’re ready for the final steps that complete your new tooth. The abutment connects to your implant and holds your crown in place, giving you back a fully functional smile.
Placing the Abutment for Support
Your dentist attaches a small connector piece called an abutment to the top of your implant post. This piece sits just above your gum line and acts as the foundation for your crown.
In some cases, placing the abutment requires a minor procedure to expose the top of your implant if tissue has grown over it. Your dentist numbs the area so you won’t feel pain during this quick process.
Your gums need time to heal around the abutment before moving forward. The abutment healing time typically takes 2 to 6 weeks, though this varies from person to person.
During this period, your gum tissue shapes itself around the abutment to create a natural-looking base for your crown.
You’ll stick to softer foods during this healing phase to avoid putting pressure on the site. Your dentist will give you specific care instructions to follow.
Fitting the Final Crown
Once your gums have healed completely, your dentist takes detailed impressions of your mouth and the abutment. These impressions go to a dental lab where technicians create your custom crown.
The lab carefully matches your crown to your natural teeth in color, shape, and size. This ensures your new tooth blends seamlessly with your smile. The process usually takes a few weeks.
When your crown is ready, you return for the final placement appointment where your dentist secures it to the abutment. Your dentist checks how the crown fits and makes sure your bite feels comfortable.
They make any needed adjustments before permanently attaching the crown.
Returning to a Normal Oral Function
You can now eat, speak, and smile just like you did before losing your tooth. Your final crown functions exactly like a natural tooth, with no special restrictions on what you can eat.
Dental implants with proper care can last a lifetime, making them a permanent solution for missing teeth. You care for your implant the same way you care for your natural teeth:
- Brush twice daily
- Floss around the implant every day
- Visit your dentist for regular check-ups and cleanings
The crown itself may need replacement after 10 to 15 years due to normal wear, though many last much longer. Your implant post stays in place permanently once it has fused with your bone.
Maintaining Long-Term Dental Implant Health
Your dental implant can last for decades with the right care and attention. Proper daily hygiene habits combined with regular dental visits will protect your investment and keep your implant functioning like a natural tooth.

Ongoing Oral Hygiene and Professional Care
Brush your teeth at least twice daily using a soft-bristled toothbrush. Pay special attention to the area around your implant, but use gentle circular motions to avoid damaging the surrounding gum tissue.
Floss daily around your implant using unwaxed tape or implant-specific floss. You can also use interdental brushes designed for cleaning around implants. These tools help remove plaque buildup that regular brushing might miss.
Visit your dentist every six months for professional cleanings and checkups. Your dentist will examine your implant for any signs of problems and remove tartar that builds up over time.
These regular dental check-ups help catch potential issues before they become serious.
Consider using an antimicrobial mouthwash to reduce bacteria around your implant. Ask your dentist which products work best for your specific situation.
Diet and Lifestyle Tips for Implant Longevity
Avoid chewing ice, hard candy, or other extremely hard foods that could damage your implant crown. While implants are strong, excessive force can crack or chip the restoration.
Limit sugary and acidic foods that promote bacterial growth and gum disease. Foods high in sugar create an environment where harmful bacteria thrive around your implant.
Quit smoking if you currently smoke. Smoking significantly increases your risk of implant failure by reducing blood flow to your gums and slowing the healing process.
This habit weakens the bone that supports your implant over time.
Wear a nightguard if you grind your teeth while sleeping. Grinding puts excessive pressure on your implant and can cause damage to both the implant and surrounding teeth. Your dentist can create a custom nightguard that fits comfortably.
Recognizing Signs of Potential Complications
Watch for persistent pain or discomfort around your implant that doesn’t go away after the initial recovery period. Some mild sensitivity is normal, but ongoing pain might indicate an infection or other problem.
Check for swelling, redness, or bleeding around the implant site. These symptoms could signal peri-implantitis, an infection that affects the tissue and bone around your implant.
Notice if your implant feels loose or moves when you touch it. A stable implant should feel firmly anchored just like a natural tooth root. Any movement requires immediate dental attention.
Contact your dentist right away if you notice:
- Pus or discharge around the implant
- A bad taste in your mouth near the implant
- Fever that develops after your initial recovery
- Difficulty chewing or biting down
Early detection of these warning signs makes treatment more effective and helps prevent implant failure.
Frequently Asked Questions
Most people have similar concerns about healing times, pain levels, and how to care for their new dental implant. Understanding what foods to eat and which warning signs need immediate attention can help you feel more confident during recovery.
How long does it typically take to recover from a dental implant procedure?
The initial recovery from dental implant surgery takes about one to two weeks. During this time, swelling and discomfort decrease after the first week and most people can return to normal activities.
However, complete healing takes much longer. The implant needs three to six months to fully fuse with your jawbone. This process is called osseointegration and happens beneath your gums where you cannot see it.
What are some common symptoms to experience after getting a dental implant?
You will likely experience swelling, soreness, and minor bleeding within the first 24 to 72 hours after surgery. These symptoms are normal and expected.
Swelling typically peaks around 24 to 48 hours after your procedure. Your face may look puffy near the surgical area. Some people also notice bruising on their face or gums.
Pain and discomfort are strongest in the first few days. Most patients find that these symptoms improve significantly by day three or four.
Are there any specific foods I should eat or avoid during my dental implant recovery?
You should stick to soft foods during the first 72 hours of recovery. Soft foods reduce pressure on the implant site and make eating more comfortable.
Good options include yogurt, smoothies, mashed potatoes, scrambled eggs, and soup. Avoid hot foods and drinks in the first 24 hours since heat can increase bleeding.
Stay away from hard, crunchy, or chewy foods for at least the first week. This means no chips, nuts, raw vegetables, or sticky candy. These foods can damage the surgical site or dislodge blood clots.
Can you provide tips for managing discomfort or pain after a dental implant procedure?
Take any pain medication your dentist prescribed exactly as directed. Over-the-counter pain relievers can also help if your dentist approves them.
Apply ice packs to your face near the surgical area for the first 48 hours. Use the ice for 15 minutes on and 15 minutes off. This helps reduce swelling and numbs the area.
Rest with your head elevated on pillows. This position helps decrease swelling and makes you more comfortable. Avoid strenuous activity for at least three days.
What signs should prompt me to call my dentist during the recovery period?
Call your dentist right away if you have severe pain that gets worse instead of better after a few days. Pain should gradually decrease as you heal.
Contact your dentist if you notice excessive bleeding that does not stop with gentle pressure. Some light bleeding is normal, but heavy bleeding is not.
Watch for signs of infection like fever, pus coming from the surgical site, or swelling that increases after the third day. Bad breath or a foul taste that does not go away with gentle rinsing also warrants a call.
How do I properly care for my dental implant during the healing process?
Keep the surgical area clean but be very gentle. Do not brush directly on the implant site for the first few days. You can brush your other teeth carefully.
Your dentist may give you a special mouthwash to use. If not, gently rinse with warm salt water starting 24 hours after surgery. Mix one teaspoon of salt in a cup of warm water.
Do not smoke or use tobacco products during healing. Smoking slows down healing and increases your risk of implant failure. Avoid drinking through a straw since the suction can dislodge blood clots.